Kamis, 13 Desember 2012

By The Way, We Make Model Boats...

We've made over 300 models. Here are just a couple. We design and  make every single piece of every model that we do. It's very time and labor intensive. We also practice photogrammetry. We've made models of new boats, old boats, sail, power, ships-modern and ancient and many other things. As a result, we are able to make models of any boat that we can get sufficient information about. You can see more photos on our FaceBook page...
 
1958 Century Resorter - note the "aircraft carrier" foredeck.

1961 Shell Lake Escapade - These were made in Shell Lake, Wisconsin.
Very similar in  style to Dorsett trailerable cruisers.

1954 Chris~Craft 17' Custom Runabout.
Chris~Craft Sea Skiff Utility.


1947 Chris~Craft 22' Sportsman (aka "U22") in diorama display.

Ashley's Hope is a Chesapeake Bay Fantail Deadrise workboat.

Happie is a classic raised-deck cruiser.

The centerpiece of IWC Schafhausen's New York Flagship Boutique
at 535 Madison Ave. It is a half-hull model of "Azzam".

A Kennebec River Bateau; the model made for a historian who writes books
 about the American Revolution and the War of 1812.

A basic Chesapeake Bay Deadrise model. It is a waterline model with
scale pier and water to create a mini diorama.

62' NordHavn at 11" LOA.

Shepherd Utility Dashboard.

Trans-Atlantic Racing Rowboat "Ghurka Spirit" crossed in 66 days.

Modern Cruiser based upon traditional Lobster Boat design.
21' 1959 Century Coronado - Probably the only Century Coronado model
in the St. Francis Yacht Club in San Francisco.

Again; this is a very small sample of our work. For more information about
our models and related services, please go to

http://intothings.com
 

Sabtu, 01 Desember 2012

The Deer Isle Koster (KDI) is a 14' double-ender that we kitted and have available for sale. The KDI was originally designed by Bruce Elfstrom, a friend and fellow boat nerd who lives and does business in Lyme, CT. He runs a very cool company doing off-road vehicle training and teambuilding all over the world (www.overlandexperts.com). A couple years ago he approached about having his KDI kitted so it would be accessible to more people new to boatbuilding. He knew he had a winner of a design and we have proven that true. The first two built, hull #1 and 2, built for his daughters, live and sail in Maine. Hull #3 is being built by another Father/daughter team in Portland, Maine, Steven and Celie Bauer.
Portland, Maine team building hull #3!
You can read about their story on their WoodenBoat Forum thread.

Hull #5 was just launched off in Washington state outside Seattle. The boat turned out great and sea trials have gone well for her builder.

KDI in Washington state

The photo below shows one of the changes made to the interior. The main bulkhead under the foredeck is open so gear can be stowed or small children! As you can see there is space under the deck for things like anchor, pumps and other equipment, leaving the cockpit free of clutter. Being a double-ender, it is critical that the boat trims on the water line for best performance. This boat is rigged with a standing lug + jib. The other option is a balance lugsail without jib. The boat will sail quite well without a jib, perhaps with slightly less windward ability. However, the balance lug will be simpler and more efficient off the wind that the lug and jib option. This is because the single big sail will provide more power than the jib, because the jib will be blanketed when sailing downwind (plus the standing lug twists more when sheeted out and the balance lug boom stays more level when sheeted out). Therefore, you will sometimes you hear of the balance lug as a "self-vanging" rig.

KDI sailing with standing lug and jib rig.
See my ad in the Small Boats 2012 annual issue in the advertising section under 'plans and kits'. The KDI kit is available and ready to cut. I'd love to help you get into one of these great boats.


Selasa, 27 November 2012

Fundamentals of Model Boat Building Should be on Your Holiday Shopping List...


Do you have a tinkerer? Someone that wants to make that model in the closet, but they've become frustrated? Do you have a child with artistic promise who could use something to help them focus their abilities? Do you wonder how a soon-to-be retiree is going to manage without going to work every day? Do you know a fantastic model maker who is looking for quality books that have information that they can really use? Do you know a boater that needs something to do this winter? Are you looking for a good book to read? Would you like to fill out that shopping list with something inexpensive?
 
You ought to take a serious look at “Fundamentals of Model Boat Building” by master model makers John Into and Nancy Price. Here are some reasons why...

Do you have a tinkerer? Making a model of the “Annie Buck”, a real Chesapeake Bay workboat is sure to make them very happy. Especially because the photographic instructions are clear and easy to follow.

Someone that wants to make that model in the closet, but they've become frustrated?Fundamentals of Model Boat Building” provides all of the information necessary to beat that frustration and make model kit building enjoyable again.

Do you have a child with artistic promise who could use something to help them focus their abilities?Fundamentals of Model Boat Building” not only teaches techniques, theories, how to see a thing and make a 3D replica of it, but how to collect information, organize it, come up with a plan of action and how to turn that plan into reality. It is a book that will continue to provide interest as they grow.
 
Do you wonder how a soon-to-be retiree is going to manage without going to work every day?
 “Fundamentals of Model Boat Building” teaches the art of “scratch-building”. Its readers learn how to see something that they choose and turn it into a model. Scratch-building has no limits. Easy to read and understand, the book is also thorough and thought provoking, leading to an avocation that is both challenging and fulfilling.

Do you know a fantastic model maker who is looking for quality books that have information that they can really use? Professional and experienced amateur model makers have praised this book for covering information that model makers usually learn the hard way, sometimes incompletely, by trial and error. Although the book is clear enough to be understood by a novice, it is presented in logical sequence and provides advanced information about materials, tools, special measuring tools and techniques, substitute materials, how to carve wood, how to draw basic plans, how to work with lines drawings, understanding offsets tables, how to measure a boat, understanding different types of construction design and much more.

Do you know a boater that needs something to do this winter? Boat lovers will find lots of information about boat design, including information about displacement hulls and planing hulls. A boater can use the 5 categories for differentiating boats from one another and test their knowledge regarding structural and measuring design features that can be applied to any boat. For example: “What is deadrise?”

Are you looking for a really good book to read? This is a “coffee table quality” book. There are stories about boats, the people that use them, what they do, how they do it, where they do it and how these elements are important to why a boat looks and performs that way that it does. What models are, how they are used in every area of life, some history of model-making, how models differ in construction methods and display types – these are some of the things covered in surprising detail. Several people with no previous interest in either boats or model making have been happily surprised at having found a unique book that is not only informative, but entertaining.

Fundamentals of Model Boat Building(ISBN-9780764331053) is a hard-cover book published by Schiffer Books, LTD. List price $34.99. It has160 pages with 264 photos and 94 drawings, all in high color, on fine paper. It has received numerous excellent reviews from magazines, blogs and readers. Available world-wide -It is not currently available for e-books.


To see some reviews and to find out where you can get your copy, please go to
 
 
For an extra special gift, you can also get a copy of Fundamentals of Model Boat Building
personally autographed by authors John Into and Nancy Price
please call 410-745-5954.


Minggu, 18 November 2012

A Very Important Event At Our Local Hobby Store...


I did something really special yesterday. I went to a model contest sponsored by our local Hobby store. It only had one problem: not enough people were partaking in what was truly a special event. This may be partially because this store only recently opened, but I can tell you that it's also a result of the way our society has been developing. I think that a lot of people have lost sight of the value of hobbies. This has been a trend of the arts in general. It is said that if you want to make millions, don't study art... I think that you'll probably find that the happiest millionaires do have some background with art, whether it be paintings, literature, music or otherwise. This argument not withstanding, let me return to the hobby show...

I met people of all ages and all kinds of backgrounds. All had one thing in common: a passion about what they had made. I'm not saying they all believed that their works were masterpieces, nor is that so important. They all derived enjoyment from the things that they made or did and, interestingly, how the things that they made gave them a way to express to others what is interesting about things that they are passionate about. Theses things included airplanes, horses, tractor trailer trucks, tanks, boats, Legos (very sophisticated), and other things. Some things were perfect, and I mean really impressive, dioramas of real situations. Some were figments of the imagination. All were done with care.

I feel like one of the “old people” making models, having now made them for 50 years. I got to meet others with a lot of model making experience and that experience showed. For me, this is equivalent to other professionals acquiring study credits to maintain their expertise. It is like attending a seminar, providing opportunities to see how others have solved problems or come up with a new idea. For those who have made models for a while, you'll understand what I mean when someone surprises you with something humorous just for those who know it when they see it. Some of the model makers may not be the best model makers, per se, but what makes their models special is what they put into them insofar as details because they understand the thing they are modeling so well.

One of the gentlemen that I spoke with had a lot to say about art in model making. We both concurred that it is helpful if you are able to see things in the formations of clouds and that it is probable that most model makers and artists do so routinely. What is so great about this? It's an exercise in imagination. It's the ability to see forms. It's part of what I call “shapeology”.

I come away both happy and sad. I'm sad, because when I was young, hobbies were encouraged. A good hobby is akin to eating what's good for you except that what you are eating tastes wonderful. Hobbies are good for you. You exercise your imagination. You learn skills. You develop expertise. In our current times, time is swallowed up by things that may or may not have lasting value. Hobbies are a way of entertaining oneself. Now, we often simply seek to be entertained. Hobbies are also social. They may involve some mentoring, from a parent or friend. Often an older family member passes to those of a younger generation things passed to them from previous generations. At events such as these, peers compete on a friendly level, learning how to clearly discern differences in the quality and accuracy of what they create and how to further refine their own abilities. These are skills that they can later use to compete in the world on ability, rather than on aggressiveness. Many life long friendships have developed through sharing hobbies. Many of the best memories we have involve time spent on hobbies with a grandparent.

A lot of things in the passing of time within societies tend to be cyclical. My gut feeling is that sooner or later, hobbies will become more popular than they are now. They may not be the hobbies that I enjoy, but that doesn't matter. Let me postulate my thoughts on what I like in a hobby. It must be enjoyable. It seems to me that the passion of it correlates with the challenge within it. Those things that are a greater test of oneself are the ones that tend to have a bit of obsession about them. We'll see what time brings...

I encourage you to plan a visit your local hobby store and see what they have that might interest you. Make sure that you really look around. I bet that you'll be pleasantly surprised.

Kamis, 15 November 2012

Making of the ultimate sail-and-oar boat: The Deblois Street Dory

For the past few years, I have been working on a dory design, the Deblois Street Dory. Hull #1 was built and launched in 2010. The builder/owner sails and rows often during the season in Casco Bay, Muscongus Bay, and Penobscot Bays on the Maine Coast. Here is one of my favorite shots:


The idea was to draw a dory that was somewhat updated in the style of todays recreational sail-and-oar boat. She has a little more stability initially than a typical Swampscott. She'll be solid or plywood planked, with flotation chambers under fore and aft (below sheer) decks, and will come in kit form or be built from scratch with a plans set. There will be half-a-dozen rig choices as well as a inboard engine well. The Maine Island Trail was a consideration in designing the boat: I wanted to be able to camp cruise the trail in a purpose built boat that rowed and sailed well. This first hull was the huge success I needed to be ready to put in the huge commitment necessary for the next phase: drawing the boat in CAD. I started with the hull and getting the lines just right. This takes awhile for me because I have a very clear vision of what I want and won't settle for anything less. 


I am now finishing the computer modeling phase of the interior and strongback. The original hand drawn plans were reproduced in a CAD program called Rhino. The boat hull, interior, hydrostatics, sail rigs, and strongback are all modeled in 3D. This will be used to make the layout drawings for the plans and the 2D CAD drawings needed to cut the parts on a CNC machine. Here is a screenshot of the interior model:


Senin, 12 November 2012

I am still active designing and building boat kits. The currrent project is still the Deblois Street Dory.

I post often on my Facebook page

www.facebook.com/clintchaseboats

You can see up-to-date progress on my projects there.

Rabu, 31 Oktober 2012

Not Another Storm Surge...


In the last few days we've again experienced "storm surge", which is something that caused a great deal of havoc here along the Chesapeake Bay during hurricane Isabel, back in 2003. That seems minimal compared to what has occured in the past few days from New Jersey to New York City and beyond because of Hurricane Sandy.


Storm surge has to do with water rising in response to winds from a storm. Storm surge along ocean beaches is usually larger and more intense than in bays and tributaries, where the intensity is controlled by a number of factors. Not being a Meteorologist, mine will be a loose explanation.

How storm surge occurs in a body of water such as the Chesapeake Bay has to do, not only with a storm's strength, but where the storm's center is relative to that Bay. The main winds of cyclones in the Northern Hemisphere spin in a counter-clockwise direction, thus a storm traveling on a Northwest track and coming ashore South of the Bay will create winds that move from the Southeast to the Northwest, which is to say up and into the Bay. Isabel traveled just such a path and piled great amounts of water into the Bay, resulting in a large Storm Surge. Many people were severly hit by flooding; some losing their homes to that storm surge, both along the Bay and throughout its major rivers and tributaries.

Track of Isabel is South of The Chesapeake Bay.
Image from NOAA.Gov


Our shop, which is along the water, was badly flooded in Isabel and ever since we have been wary of any major storm that comes up the Atlantic to our area.


Our workshop after Hurricane Isabel in 2003 (in the early
days of digital cameras).
Sandy,unlike Isabel, traveled a Northwest path, but came ashore North of the Bay and the counterclockwise push of water was largely out of the Bay. That is, during the initial impact. As Sandy moved inland part of that circular motion began to push from the Southwest, but with far less impact than Isabel. You may want to play with a compass and piece of paper to illustrate the principle.


Hurricane Sandy's path was North of the Chesapeake Bay.
Image from NOAA.gov
Twice, the storm surge from Sandy moved to within a few feet of our shop, causing a lot of stress, but neither time did it quite get inside. We were extremely lucky. From the information I could find I believe that our storm surge was probably about 3 feet above mean high tide. Here are two, very different photos of David and the Annie Buck, one from the first day that the rain bands came ashore, the second taken during the storm, but a short time before the peak of the surge. Notice the differences in, not only the height of the water, relative to the pier, but also how much higher the boats are floating.

An average high tide here is not much higher than this.

This is a dangerous situation. The storm surge has reached a little under 3 feet.
If you could see the shorelines, the creek looks much larger than normal.
We were lucky around here. A lot of other people faired far worse and our thoughts are with them. I know that there was a whole lot of damage North of us. Depending upon how bad that damage is, this storm may be remembered for taking the tall ship "Bounty". Like most hurricanes, there are a lot of stories that will come out of it.

Senin, 29 Oktober 2012

Dressing up The Annie Buck in The Eye of The Storm


Phase II of the Annie Buck's change over from her summer outfit to her winter outfit occurred as two incredible storms were on our doorstep: Hurricane Sandy (otherwise known as Frankenstorm) and the 2012 Presidential Elections. As I write this, the hurricane is bearing down on us, so if my writing seems a bit off, it's because I've got my mind in a few different places. This story is about yesterday and as I write it I don't know what the outcome of today will be...


David pointing to the winch on the boom. The mast is the pole
with the "whiskers".

It has to be done when it has to be done and on the day the rain bands were arriving in advance of Hurricane Sandy, it was necessary to install the mast and boom used for oyster dredging into the Annie Buck to be ready in time for the season.
 
About a month ago, I wrote about the removal of her canopy, a coordinated task involving the efforts of a number of Watermen and neighbors. This is a similar type of task. The mast is made of steel and, although I don't know exactly what it weighs, it weighs at least several hundred pounds. It is the long pole with the “whiskers”, which are steps to climb to its top for whatever maintenance might be required. The Boom is made from aluminum and it weighs somewhat less, but the winch attached to it adds a lot of pounds.

The boom comes out of the truck first.
All of the work was again supervised by“Keeper”, who knows all corners of the boat. Our part starts when we meet David at his truck, where he has somehow managed to load both mast and boom. They are precariously balanced, the weight bolstered by some people sitting on the truck-cab ends as if on a see-saw. The trip to the boat is about 500 yards and uneventful.


The mast has to be installed first, but the boom is on top, and so it is the first off the truck. It is placed out of the way, as much as it can be, on the dock.
 

The mast is all steel and quite heavy.
As it was when we removed the canopy, you find that it's a long distance from the decks of the boat to the floor, especially when you are carrying something heavy and even more so when there is a momentum to the object being carried, because of all of the people involved. Everyone has to be quick and careful and to be aware that if you are at the wrong part of the dock, or boat, it is easy to step off onto nothing and end up in the water.


Board being bolted to mast bottom.


The bottom of the mast is attached to a board which is bolted to the floor just behind the pilot house. That board is bolted to the mast first and then the mast is brought upright. There is a bit of finagling to get the bolt holes in the board to line up with those in the floor. When the holes are aligned, lag bolts are set in, but the mast is by no means secured.


Raising the mast.

What really controls the stability of the mast are the various lines running from the top of the mast to the bow of the boat and to points near the sheer line in the forward half of the boat. These lines are made of “wire rope” and their tension is controlled by long turnbuckles.


Securing the mast.


After the mast is in place, the boom is brought aboard and attached to its mounting point by a very sturdy assembly made of stainless steel. Of course, as we are doing all of this, there is a wall-like line of clouds in the SouthEast sky; probably the first part of Sandy... 


Bringing the boom aboard.

 
The boom is not raised yet to its normal spot. It doesn't need to be today. It's time for everyone to go and batten down the hatches at home.


I just want to say that it's clear as I write this, that  a lot of people that we know and love are going to be hit hard by this one. I hope that everyone fares well in Hurricane Sandy...


Sabtu, 13 Oktober 2012

Got Gas????

No, not that kind...

If you are a regular user of Cyano Acrylate glues, otherwise known CA as Super Glue, it's likely that you do.
"Gassing" is the white residue that appears around your glue joints, especially on dark surfaces, clear surfaces, or on shiny metal. It makes an otherwise perfect joint, look, not so perfect. Sometimes it's an indication that too much glue has been used. At other times, especially with gels, you may not have a choice but to use an amount of glue that makes gassing unavoidable.


One of the biggest problems involving gassing is that it might not show up until a day or two after you've made your joint. This can be fixed if you can get to the joint. I avoid using CA to close up cabin spaces on boats or airplanes, because gassing may not appear for quite some time and it may be amplified in small enclosed spaces, possibly frosting windows to an extent that blocks vision. This can be "visually fatal" to an otherwise impressive interior space.


If I used CA glue to close this up, Happie would have been miserable
and I would have been devastated.


In those situations I use non-gassing glues, such as type II carpenter's glue, epoxy or watch crystal cement, depending upon the specific situation. Of course, each glue has its own pluses and minuses.

Using a non-gassing glue made Happie happy.
If your gassing is in an accesible spot...

...relief from gas can be found on your grocery store shelf...
 
I am a believer in the concept that model makers can benefit from learning to see and use common things outside of their common context. Here is an excellent example. I found this method by accident years ago and it's helped me many times since:  Olive oil applied directly to gassing seems to make it disappear. There are cases where it doesn't do the job completely, but those are rare. I haven't found anything that works as well. What you have to bear in mind is that it is an oil, which could affect other nearby items in your model, especially unsealed wood or the adhesive of graphics tapes. I usually dedicate a very small artist's brush to the job which allows me to apply it precisely and sparingly. After it sits for a minute, or when I can see that the gassing is gone, I lightly dab the excess oil away with a corner of a paper towel. Give it a try!

Sabtu, 29 September 2012

Those Who Have Read The Book...


...will remember David and his boat the “Annie Buck”. As I was struggling to get one of my special tools, an ancient Alps MD 5000, otherwise known as the decal printer to have, to work, I was interrupted with a pleasant surprise. It was David outside my door yelling “Anyone want to go for a boat ride?” I've had a lot of rides in all kinds of boats and ships, but I still and always will, look forward to this one.

It's that time of year again. Fall is upon us and Watermen throughout the Chesapeake region are changing their rigs from crabbing gear to oystering gear. As you'll recall, the summers here can be very hot. To protect the waterman and his catch from the broiling heat, a Deadrise, the type of workboat most frequently used in the Chesapeake Bay, is often outfitted with a seasonal “canopy” (Don't call it a "roof").


There is a reason for the ride.We are bringing the boat to the town wharf where other watermen and neighbors come together in order to remove her canopy for the winter. It weighs hundreds of pounds and, despite its size, can easily be damaged. David will, in turn, go around to help other watermen take the canopies off of their boats. It's a rite of Autumn.  In the near future we will be installing some winter equipment in another rite of the season - more on that when it happens...

David's co-pilot, “Keeper” is along for the ride. I've often heard that “dogs like trucks!” I can tell you that when a dog likes a boat...  well...  Let's just say that Keeper loves his boat!

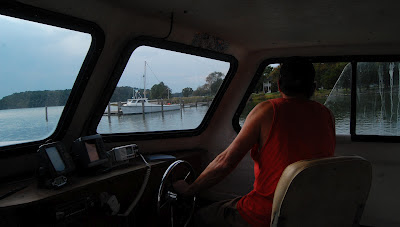
For this ride the sky is ominously dark, but no rain. The water's surface is like glass. As you'll recall, the “Annie Buck” has a planing hull. True to form, when David hit the throttle she virtually lept out of the water. What a ride. We live in a truly beautiful place. It's beautiful from the land, but it's beautiful in an entirely different way from the water.


It's a good thing that there are other watermen involved. They know just how to handle things so that nothing, including people gets damaged.

On the “Annie Buck” the support structure is this: the front edge of the canopy is supported by the roof of the pilot house. In the rear area it is supported by struts running from the floor of the cockpit to the canopy's frame. These struts are also bolted to the gunwhales to increase rigidity.


In preparation, David has removed most of the bolts in the struts, leaving those that remain loose. A stuck bolt, to be expected in the marine environment, can bring the whole process to a halt.
 
When the process begins, some people move to hold up the rear of the canopy frame; others unscrewing and punching out the remaining bolts from the struts. The struts crash to the floor and suddenly everyone is  holding up the full weight of the canopy. It gets heavier when some people let go in order to step from the boat onto land. Once there, they resume their lifting and the canopy is moved just far enough from the boat that part of its frame can rest on some pilings allowing those of us, still in the boat, to get out and resume our positions. From there we carry it about 50 feet to a waiting trailer. (Unfortunately, I don't have photos of the process itself, because my hands were a bit full.)


On the trailer are 4 inverted bushel baskets. They are maneuvered to points that support the frame of the canopy. We can finally let it down. The canopy is much longer than the trailer, requiring a delicate balancing act to make sure that it doesn't come off of the trailer during the ride to David's house. I find it amazing to think that these lightweight baskets, only 4 of them, can support the hundreds of pounds that the canopy weighs. It's a good lesson in physics...
 
The ride home is beautiful again. You can see how different the boat looks when the canopy is absent. Things are opened up and brighter. The boat seems just a bit faster; perhaps an illusion, but it does weigh less and should be a bit more aerodynamic than it was with the canopy installed.

 
The whole lifting process took much less time than either trip, probably under 4 minutes. But, there is a level of intensity about it, with everyone seemingly choreographed to do the right thing at the right time. By comparison lifting it from the trailer, once home,  was a quick task of laying down some cinder blocks and resting the canopy on them until it's needed next spring.

As I re-read this, I fear that I may be giving the impression that this was about having fun. No, it's just a small part of the very, very hard work that watermen do. For me, it is an honor and learning experience to partake. Hopefully, some of this information will be of help you as you work up your own model of the "Annie Buck".
I am grateful for the opportunity to be there and wish all of my waterman friends the best of success in the coming oyster season.

Funny thing, now that I'm home. For some reason, my Alps printer seems to be working again. Now I can get back to what I know how to do well...